ANSYS Mechanical Batch Tutorials
This tutorial will introduce you to submitting ANSYS jobs in batch to the Rescale platform. We will create an input file from the respective ANSYS software, start a Rescale job, submit, and transfer the results back to ANSYS.
Pre-processing activities (e.g. geometry, mesh/model) are already completed and all solverA solver is a numerical algorithm or a software tool that so... More and setup settings are already determined as well. Unlike job submission through RSM, you do not need to launch Rescale Desktops. You can use your own ANSYS software and license or reach out to us and purchase some Elastic License Units (ELUs).
This tutorial focuses on static structural analysis for a tapered beam in ANSYS Mechanical 19.0 and demonstrates how to submit the run as a batch job on the Rescale platform. The example modelA numerical, symbolic, or logical representation of a system... More is a 15-foot long tapered I-beam made of steel. It’s fixed at the larger end and a 500-lb force is applied at the smaller end.
To obtain the Workbench project file (.wbpz) for the tutorial, please click on the Import Workbench project link below and click on the Save option located on the top right corner of the job submission page to have a copy of this file in your Rescale cloud files.
Creating input file from Workbench
- Before we create the input file, please check that the status of the pre-processing cells before the setup are complete (Green check marks).
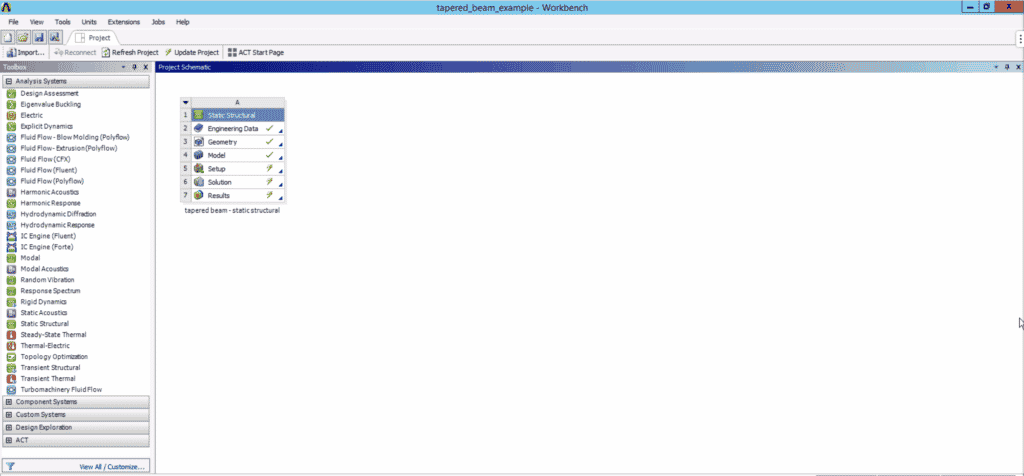
- You can follow these steps to create the input file – Once all definitions are completed, double click on Setup (A5). In the ANSYS Mechanical window, highlight the Solution (A6) state in the tree on the left, then go to Tools > Write Input File…
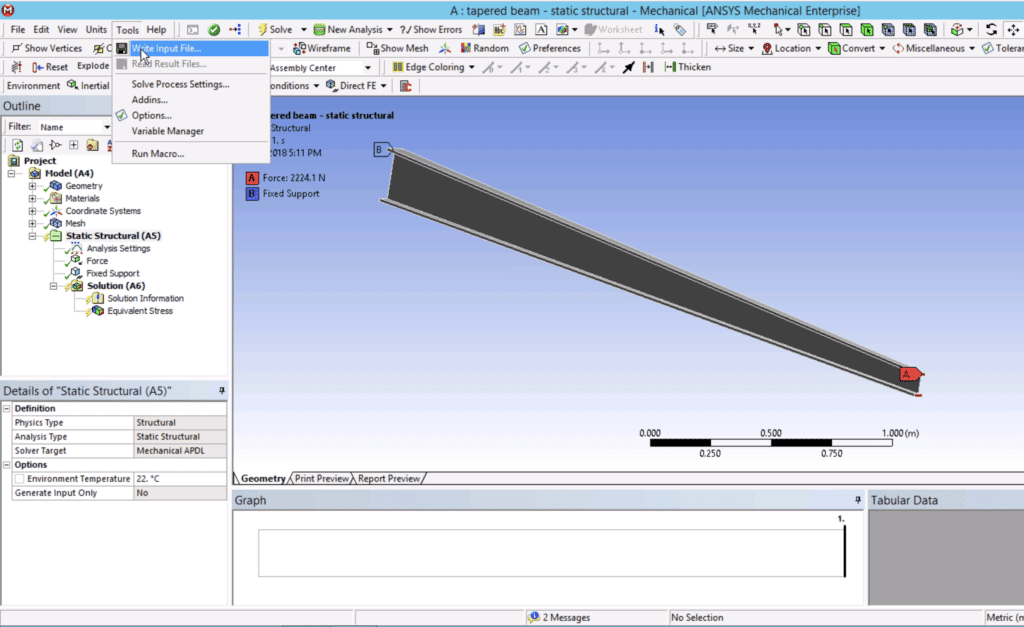
- You will be prompted to a “Save as” window. Choose the appropriate file name and directory. For this example, we name it: input_batch.dat.
Rescale Job Submission
- Go onto the Rescale platform, start and name a new job, and upload the input file that you generated from Workbench. You can either upload the input file from your local computer or from the Rescale cloud files.
- For this example, configure the software settings by selecting Ansys Mechanical version 19.0. For more information on launching a basic job, please refer to the tutorial here.
- Under the command window, you will need to specify the input file name under the angle bracket . In this tutorial, the command will be as highlighted below in the picture.
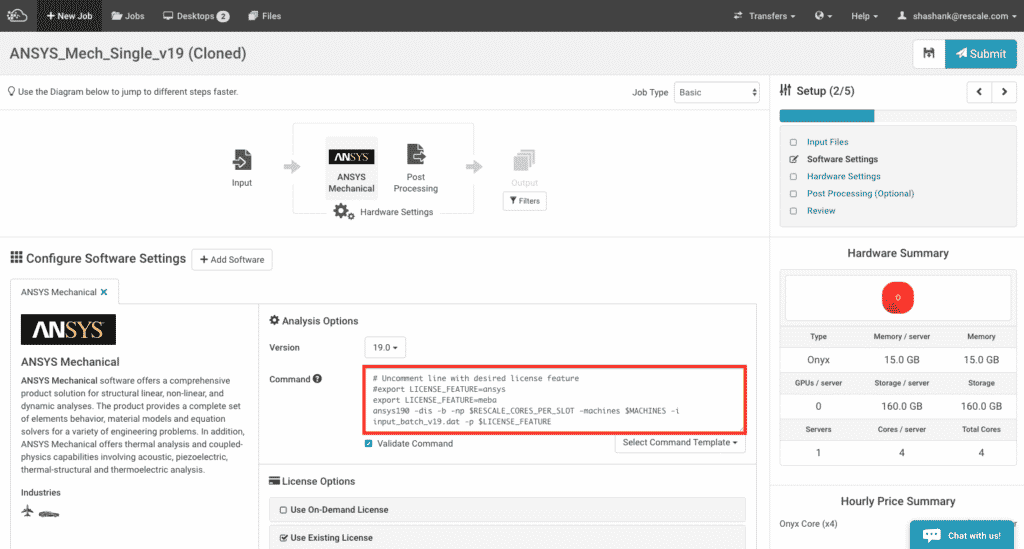
- Specify your license option, and move onto hardware settings. This example will be run on 4 Emerald cores. There is no post-processing options here.
- Submit your job, and feel free to monitor the status of your job and get information about your clusterA computing cluster consists of a set of loosely or tightly ... More in real-time. A guide on “Monitoring Status” on Rescale is found here.
View Results
Once the job is completed, you can either view the results on your local workstationA workstation is a powerful computer system designed for pro... More or on a Rescale Desktop. Both methods are presented below:
On your Local Workstation
Once the job is completed, you can select the file(s) that you wish to download.
Note: If you have large output files, it is recommended that windows users use Rescale Transfer Manager (RTM) to download files faster onto your on-premises workstation. More information about RTM can be found here. Linux or Mac user can use Rescale CLI to download larger output files.
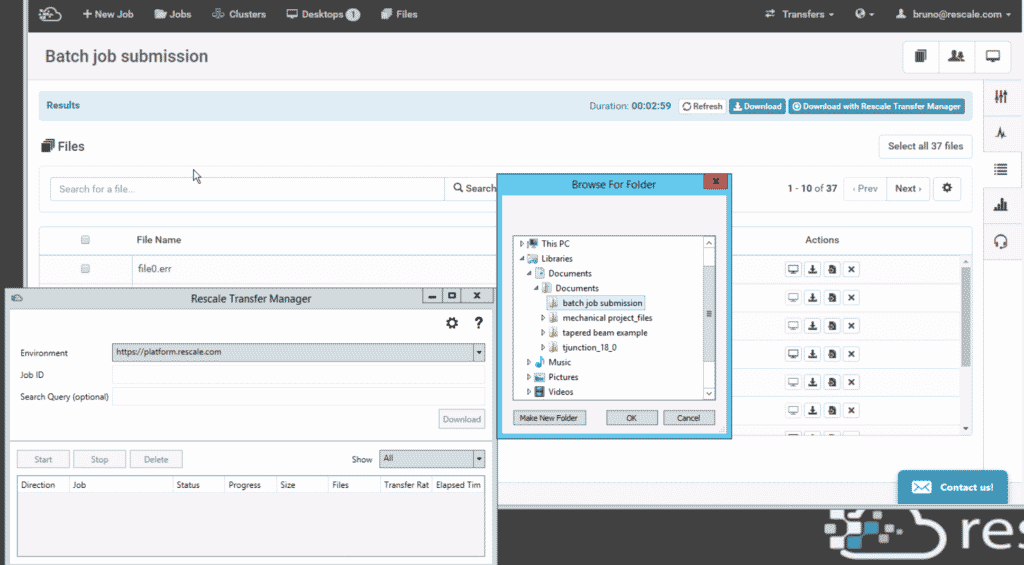
- Go to the job results page, click Download with Rescale Transfer Manager. If a warning message pops up, click on Open Rescale.TransferClient.UI
- A Browse for folder window will open, select a destination where you want to save the job results and click ok. It will download and wait until the status shows “Complete”. The files will be saved into a folder named after the job.
- Go to Workbench, highlight the Solution (A6) state on the tree on the left, then go to Tools > Read Result Files…
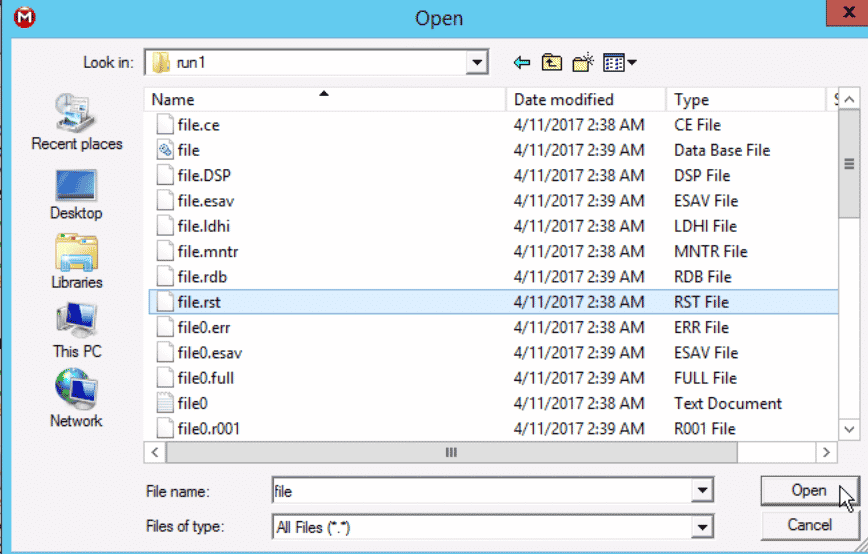
- An Open window will display. Find the directory you specified earlier. This example is a Rescale Basic job and the output files will be under the “run1” folder. Select the “file.rst” file and click open. Wait for the results to completely load into ANSYS Mechanical. One way to verify this is to look at the tree and the Solution (A6) state should appear green check marked
On a Rescale Desktop
Once the job is completed, you can follow these steps to view results on a Rescale Desktop:
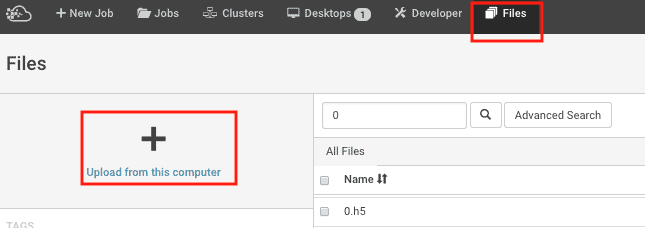
Upload your .wpbz workbench archive file to the Rescale Cloud. Click on Files and on Upload from this computer. This will open up a window. Navigate to the location where the ‘.wpbz` file is located. Click on the file and click Open
Set up a Desktop Session:
- Under 1.Choose Configuration dropdown, select the hardware for your Desktop Session
- Under 2.Add Software dropdown, select ANSYS Structures Desktop
- Under 3.Jobs dropdown, search for the job you wish to add by typing the name and/or browsing through the list. Click Add to add a job to the Desktop
- Once the Desktop session is started, launch Ansys Workbench located on the Rescale desktop
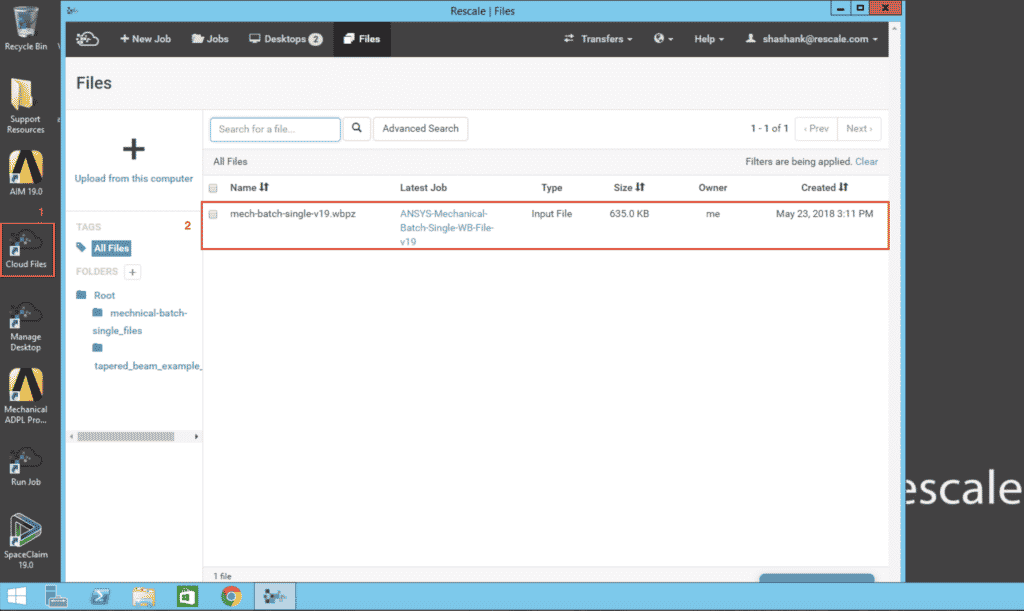
- Download the `.wpbz’ workbench archive file from Rescale Cloud Files as follows – Click on Cloud Files icon located on the Rescale Desktop. On the Rescale window, go to the Files tab and check the box next to the archived workbench file. Click on Actions > Download selected file. The file is downloaded to the Downloads directory on the Rescale Desktop
- In ANSYS Mechanical, you can restore the project archive by clicking on File and Restore Archive. Navigate to the location where the
.wpbzfile is located and click on it. In this example, it is saved asmech-batch-single-v19.wbpz - In the outline tree, highlight the Solution (A6) state on the tree on the left, then go to Tools > Read Result Files…

- In the Open window, find the directory you specified earlier. This example is a Rescale Basic job and the output files will be under the “run1” folder. Select the file.rst file and click Open . Wait for the results to completely load into ANSYS Mechanical. One way to verify this is to look at the tree and the Solution (A6) state should appear “green check marked”
Important: You must preserve the directory where the .rst and all other result files are located. Failure to do so may result in files not loading on Workbench.
At this point, you can proceed to your post-processing activities as you would normally do after solving an Ansys Mechanical simulationSimulation is experimentation, testing scenarios, and making... More in the Workbench GUI.
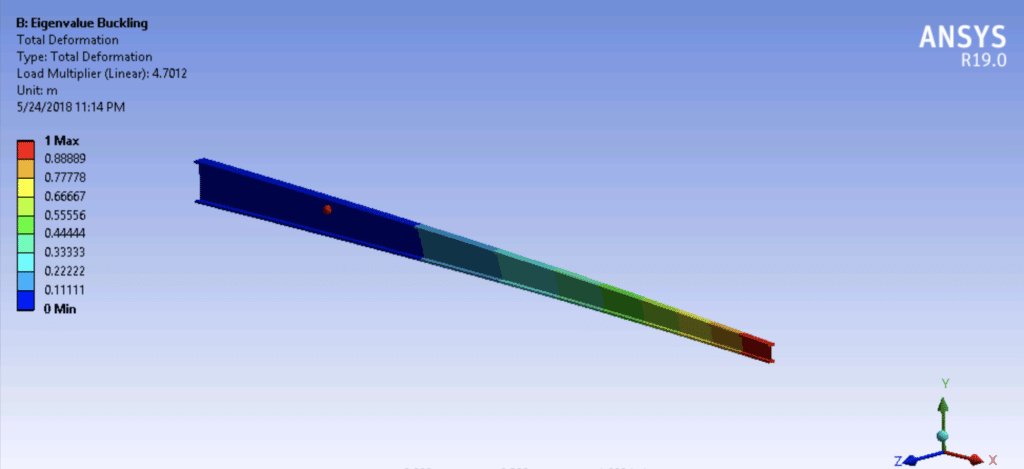
The focus of this section is for ANSYS Mechanical in batch mode for multi frame analysis. In several cases, the analysis may consist of more than one system. Therefore, an input file must be generated for each system. In this example, the solution for tapered beam from previous section is the base analysis. We are interested in finding the critical load of the beam under buckling using Eigenvalue Buckling analysis. To continue, we need a second input file in System B plus the restart files from System A. Refer to ANSYS documentation for more information about multiframe restart and APDL.
Import Workbench Project
Import Job Setup
Get Job Results
Creating input file from workbench
- For a multiframe restart, create the required connections between the two systems on workbench and then solve the base analysis as shown in the previous section. After the first system’s run has been completed, read the result files in the first system as shown in the previous section under the heading Viewing Results
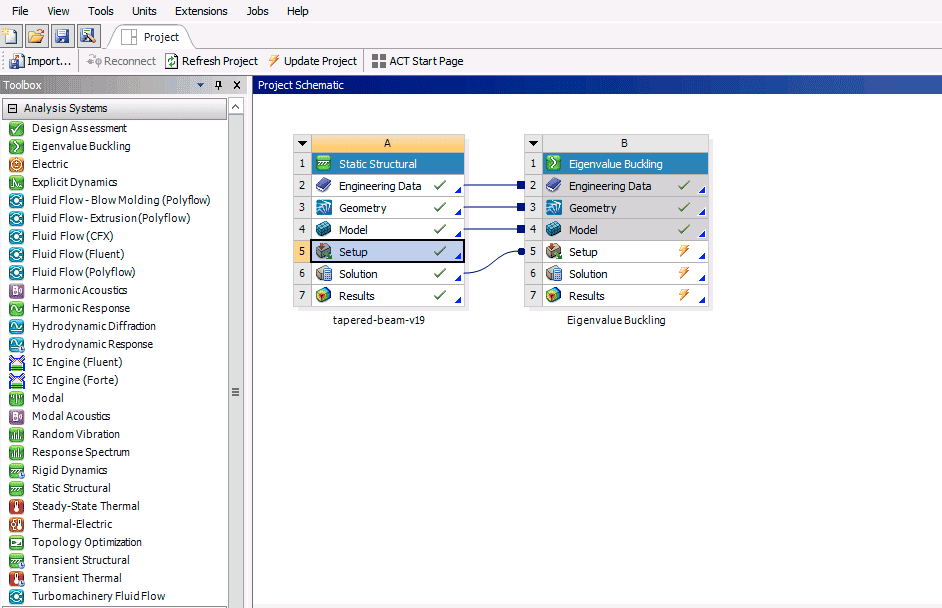
- Please check that the status of all pre-processing cells are complete (Green check marks). Additionally, check that the two systems are connected and that the solution from system A is connected to the setup of system B.
- Open ANSYS Mechanical and highlight the Solution (B6) state instead to write a second input file.
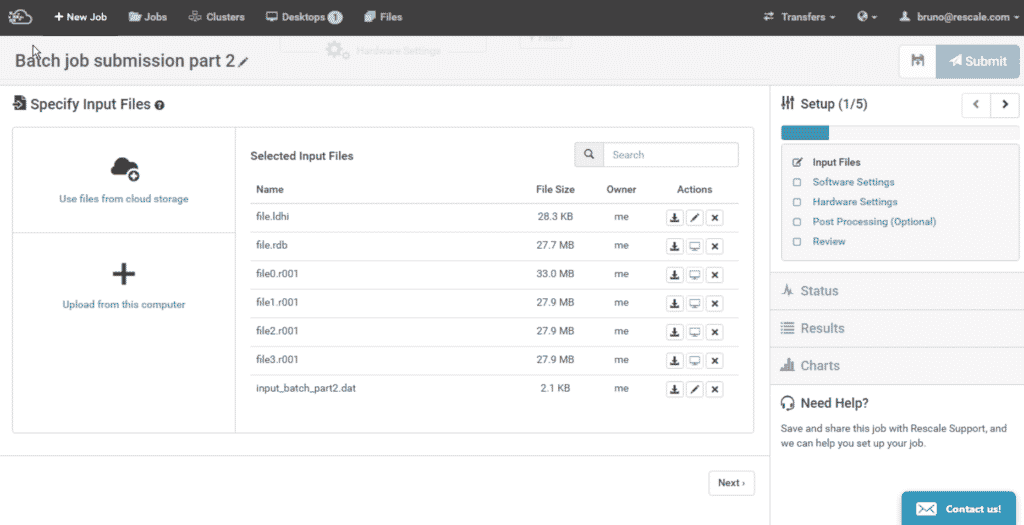
- Start a new job and upload this new input file. For this eigenvalue buckling example, we also have to upload the .rnnn, .rdb, and .ldhi restart files from the base analysis.
Rescale job submission
The rest of the workflow for job submission is the same as previous section. After the job submission, please make sure to include the updated job files to the Rescale desktop for viewing the results.
Viewing results
Upload your archived workbench file to the Rescale cloud and download it to the Rescale desktop. Restore the archive file on workbench and highlight the Solution (B6) state to read the new result file.
The simulation in this example calculated a load multiplier of 4.7012. Since we applied 500 lbs of force, this means that the critical buckling load is 2350.6 lbs of force.