AI-Enabled R&D with NVIDIA Modulus on Rescale
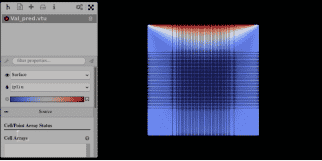
In this tutorial, learn how to use NVIDIA Modulus to develop physics-informed neural networks (PINNs) for accelerating initial design discovery.


Filtered Views are used to create, share, and save custom views of jobs and workstations for enhanced navigation and teamwork.
Access the latest releases of leading simulation software, pre-installed and ready to power your next innovation.
Enhancements to Rescale Cloud File System (CFS) include support for AWS FSx Lustre and the ability to backup and recover previous storage CFS storage device.

IP address access policy (CIDR Rules) for access to the Rescale platform can be configured. There are two scenarios: Per Rescale security policy, the 0.0.0.0/0 rule is blocklisted (not allowed); this includes ‘quad 0’ and derivatives. 1. Organization Level: Platform Web UI Access Policy At the organizational level, a platform administrator can define the CIDR rules to allow…
Step 1: Login to Okta portal with admin account Step 2: On top right click on ADMIN button Step 3: Go to Applications menu Step 4: Click on Add Application button on left side of the window Step 5: Click on Create New App Step 6: On the pop-up window, Select platform as Web and…
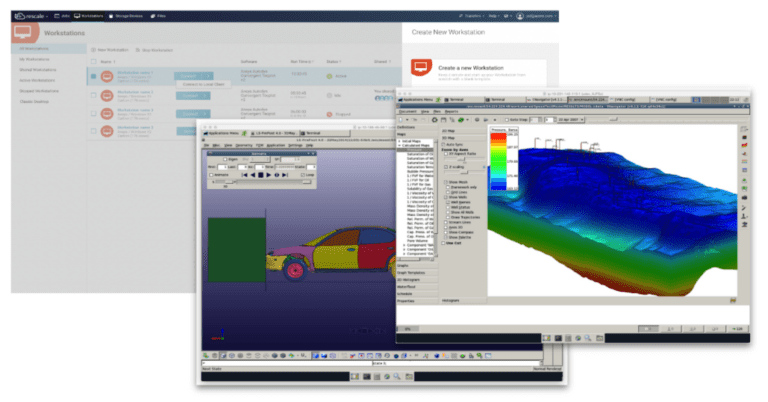
Monitoring Workstations in the Administrative Activity Page Workstations can be monitored through the Workspace Admin > Activity to determine how long they have been in a running or suspended state. Workstations can be Shutdown, Deleted, or Assigned to a Project from this list. Auto-Terminate Long-Suspended Workstations Administrators can auto-terminate long-suspended workstations by setting a policy…
Rescale Metadata Management is an advanced data management framework designed to streamline and enhance simulation data management in engineering and R&D. It provides a seamless, flexible, and automated approach for engineers to capture, manage, and utilize metadata effectively. Rescale Metadata Management supports any engineering and scientific application, ensuring broad compatibility and integration with existing systems….
Overview In this tutorial, we will learn how to get started with NGC CUDA Quantum on the Rescale platform using the NGC Container image which contains all CUDA Quantum releases. We will use the built-in examples within the Nvidia CUDA Quantum image to demonstrate the agility, scalability and ease of use of the Rescale platform…
Please note that this feature is currently in beta and not enabled by default. Please contact your organization’s Solution Architect or Account Executive to enable access. Overview Rescale High Throughput Computing (HTC) is an API-based Rescale product for running a large number (e.g., hundreds to millions) of concurrent small and decoupled jobs (e.g., single-digit cores…
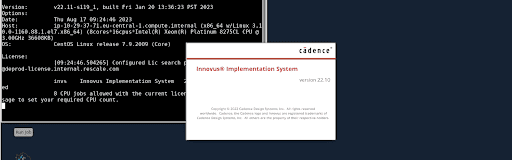
Overview In this tutorial, we will learn how to get started with Cadence Innovus software on the Rescale platform using a flat implementation flow which can be applied to chip level designs as well as blocks. We will use the block implementation Rapid Adoption Kit (RAK) from Cadence Innovus which is also available on the…
Overview This page walks you through how to use and set up your Jobs and Workstation pages. In order to access the Jobs feature, log in to your Rescale account (Rescale Platform). You can create an account here if you don’t have a Rescale account. From the Job and Workstations page, you can view, manage, and configure…
Last updated: July 19th, 2023 Overview This page walks you through the job sharing feature, designed to foster enhanced collaboration within your team! This guide will walk you through how you can seamlessly share your running or completed jobs with others, promoting efficient knowledge sharing, team collaboration, and more productive workflows. Whether you’re sharing real-time…
Related: Resource Tagging: schemaless tagging for flexible categorization. Custom fields allow administrators and users to define custom fields for jobs. This feature enables greater flexibility in data capture and job management, allowing users to input job-specific information in a structured manner. There are two types of custom fields. This article will focus on Admin-Enforced fields,…
Introduction and Definitions Resource tagging is a powerful feature in Rescale that allows you to categorize and organize your resources (Jobs, Workstations, and Files) with tags. By tagging your resources, you can easily search, filter, and group items based on specific criteria, making it more efficient to manage your projects and tasks. This user guide…
Overview Rescale is happy to provide Rescale Software Publisher in Beta Release. We welcome customers to try out this new capability and provide us feedback. Please contact your Rescale account team for details if you are interested. Rescale Software Publisher is a new product feature that allows organizations to bring their own software to…
The Company Admin page Dashboard will present a summary of usage to the users. Links to Platform Admin Pages Should you require a region-specific dashboard, the following table of links will take you to each of the region-specific Admin Pages. Platform Region Dashboard link United States US Dashboard European Union EU Dashboard Japan JP Dashboard…
Overview The Economics Dashboard gives customers a birdseye view of their monthly compute and software spending across projects and teams helping you prioritize projects and reallocate resources. It is supported at both Organization and Workspace levels. Widgets on the Economics Dashboard Charges Widget Charges widget displays the monthly total charges, software charges, and compute charges…
Compute Optimizer is currently in Private Beta, available for any customer. If you would like access, please get in contact with your Rescale Representative. Overview Rescale’s Compute Optimizer is a feature that helps users choose the optimal hardware for their workloads, based on performance, cost, and maturity. It uses machine learning (ML) to make recommendations…
Overview This document describes the methodology to connect and monitor a Rescale ANSYS Fluent batch job remotely using ANSYS Fluent Remote Visualization Client from a Rescale or local Workstation. Prerequisites Setup SSH connectivity in Job Settings before any jobs are submitted, as described here. A Rescale Batch and Workstation job are required to be submitted…
Overview This page describes the methodology of firstly generating a Secure Shell (SSH) Keypair, and secondly, how to Secure File Transfer Protocol (SFTP) into a storage device. The same method that works for STFP into a Storage Device can also be used to SFTP into a Running job (which can be useful in some scenarios)….
Rescale Elastic Cloud Workstation (ECW), known as Workstations, offer you an easy way to provide a secure, managed, cloud-based virtual engineering experience to your end users. Workstations take care of the heavy lifting of running simulations and provide a fully managed service so that you don’t have to worry about procuring, deploying, and managing a…
Learn how to use Rescale Elastic Cloud Workstations, offering you an easy way to provide a secure, managed, cloud-based virtual desktop experience.
| Cookie | Duration | Description |
|---|---|---|
| AWSALBCORS | 7 days | This cookie is managed by Amazon Web Services and is used for load balancing. |
| cookielawinfo-checkbox-advertisement | 1 year | Set by the GDPR Cookie Consent plugin, this cookie is used to record the user consent for the cookies in the "Advertisement" category . |
| cookielawinfo-checkbox-analytics | 11 months | This cookie is set by GDPR Cookie Consent plugin. The cookie is used to store the user consent for the cookies in the category "Analytics". |
| cookielawinfo-checkbox-functional | 11 months | The cookie is set by GDPR cookie consent to record the user consent for the cookies in the category "Functional". |
| cookielawinfo-checkbox-necessary | 11 months | This cookie is set by GDPR Cookie Consent plugin. The cookies is used to store the user consent for the cookies in the category "Necessary". |
| cookielawinfo-checkbox-others | 11 months | This cookie is set by GDPR Cookie Consent plugin. The cookie is used to store the user consent for the cookies in the category "Other. |
| cookielawinfo-checkbox-performance | 11 months | This cookie is set by GDPR Cookie Consent plugin. The cookie is used to store the user consent for the cookies in the category "Performance". |
| viewed_cookie_policy | 11 months | The cookie is set by the GDPR Cookie Consent plugin and is used to store whether or not user has consented to the use of cookies. It does not store any personal data. |
| Cookie | Duration | Description |
|---|---|---|
| __cf_bm | 30 minutes | This cookie, set by Cloudflare, is used to support Cloudflare Bot Management. |
| bcookie | 2 years | LinkedIn sets this cookie from LinkedIn share buttons and ad tags to recognize browser ID. |
| lang | session | LinkedIn sets this cookie to remember a user's language setting. |
| lidc | 1 day | LinkedIn sets the lidc cookie to facilitate data center selection. |
| player | 1 year | Vimeo uses this cookie to save the user's preferences when playing embedded videos from Vimeo. |
| Cookie | Duration | Description |
|---|---|---|
| AWSALB | 7 days | AWSALB is an application load balancer cookie set by Amazon Web Services to map the session to the target. |
| sync_active | never | This cookie is set by Vimeo and contains data on the visitor's video-content preferences, so that the website remembers parameters such as preferred volume or video quality. |
| Cookie | Duration | Description |
|---|---|---|
| _ga | 2 years | The _ga cookie, installed by Google Analytics, calculates visitor, session and campaign data and also keeps track of site usage for the site's analytics report. The cookie stores information anonymously and assigns a randomly generated number to recognize unique visitors. |
| _gat_UA-32985745-1 | 1 minute | A variation of the _gat cookie set by Google Analytics and Google Tag Manager to allow website owners to track visitor behaviour and measure site performance. The pattern element in the name contains the unique identity number of the account or website it relates to. |
| _gcl_au | 3 months | Provided by Google Tag Manager to experiment advertisement efficiency of websites using their services. |
| _gid | 1 day | Installed by Google Analytics, _gid cookie stores information on how visitors use a website, while also creating an analytics report of the website's performance. Some of the data that are collected include the number of visitors, their source, and the pages they visit anonymously. |
| CONSENT | 2 years | YouTube sets this cookie via embedded youtube-videos and registers anonymous statistical data. |
| utm_campaign | past | Google Ad Services sets this cookie to store session campaign value if present. |
| utm_content | past | This cookie is used for storing the session content value if present. |
| utm_source | past | This cookie is used to record from where the visitor came to the website orginally. This information is used by the website operator to know the efficiency of their marketing. |
| utm_term | past | This cookie is used to record from where the visitor came to the website orginally. This information is used by the website operator to know the efficiency of their marketing. |
| vuid | 2 years | Vimeo installs this cookie to collect tracking information by setting a unique ID to embed videos to the website. |
| Cookie | Duration | Description |
|---|---|---|
| _fbp | 3 months | This cookie is set by Facebook to display advertisements when either on Facebook or on a digital platform powered by Facebook advertising, after visiting the website. |
| _mkto_trk | 2 years | This cookie, provided by Marketo, has information (such as a unique user ID) that is used to track the user's site usage. The cookies set by Marketo are readable only by Marketo. |
| fr | 3 months | Facebook sets this cookie to show relevant advertisements to users by tracking user behaviour across the web, on sites that have Facebook pixel or Facebook social plugin. |
| IDE | 1 year 24 days | Google DoubleClick IDE cookies are used to store information about how the user uses the website to present them with relevant ads and according to the user profile. |
| personalization_id | 2 years | Twitter sets this cookie to integrate and share features for social media and also store information about how the user uses the website, for tracking and targeting. |
| test_cookie | 15 minutes | The test_cookie is set by doubleclick.net and is used to determine if the user's browser supports cookies. |
| utm_medium | past | This cookie is used to record from where the visitor came to the website orginally. This information is used by the website operator to know the efficiency of their marketing. |
| VISITOR_INFO1_LIVE | 5 months 27 days | A cookie set by YouTube to measure bandwidth that determines whether the user gets the new or old player interface. |
| YSC | session | YSC cookie is set by Youtube and is used to track the views of embedded videos on Youtube pages. |
| yt-remote-connected-devices | never | YouTube sets this cookie to store the video preferences of the user using embedded YouTube video. |
| yt-remote-device-id | never | YouTube sets this cookie to store the video preferences of the user using embedded YouTube video. |
| yt.innertube::nextId | never | This cookie, set by YouTube, registers a unique ID to store data on what videos from YouTube the user has seen. |
| yt.innertube::requests | never | This cookie, set by YouTube, registers a unique ID to store data on what videos from YouTube the user has seen. |
| Cookie | Duration | Description |
|---|---|---|
| _chtbl | session | No description available. |
| _dtses | 30 minutes | No description available. |
| _dtuid | 10 years | No description available. |
| BIGipServersj30web-nginx-app_https | session | No description |
| past | No description available. | |
| gclid | past | No description |
| handl_ip | 1 month | No description available. |
| handl_landing_page | 1 month | No description available. |
| handl_original_ref | past | No description available. |
| handl_ref | past | No description available. |
| handl_url | 1 month | No description available. |
| li_gc | 2 years | No description |
| muc_ads | 2 years | No description |
| username | past | No description available. |